IN THIS ARTICLE
Why Repotting Best Time to Repot Repotting Signs Benefits of Repotting Cautions & Tips
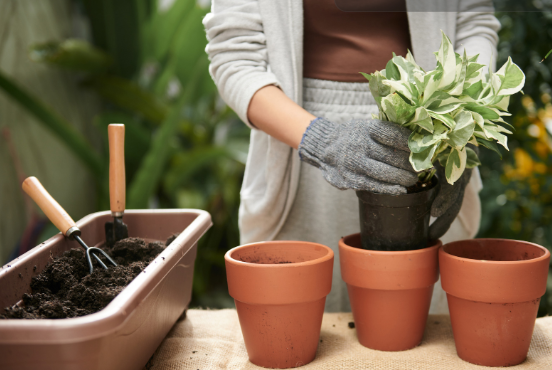
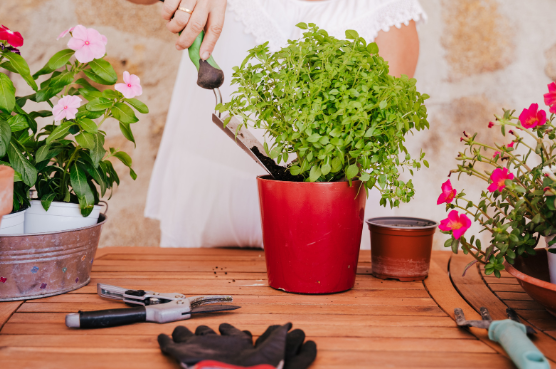
Repotting is essential for keeping your plants healthy and thriving. While spring is often seen as the best time for this task, it’s not the only option.
During this quieter season, Winter is ideal for refreshing soil and reducing stress on your plants.
Curious about the benefits of winter repotting? We’ll also cover the differences between repotting indoor and outdoor plants, so you can make the best choice for your green friends.
Explore the advantages of repotting in winter and discover how to keep your plants happy and healthy all year round!
Why Repotting
Repotting is essential for plant care for several reasons. First, over time, the soil in a pot can become depleted of vital nutrients, and repotting provides fresh soil that nourishes the plant.
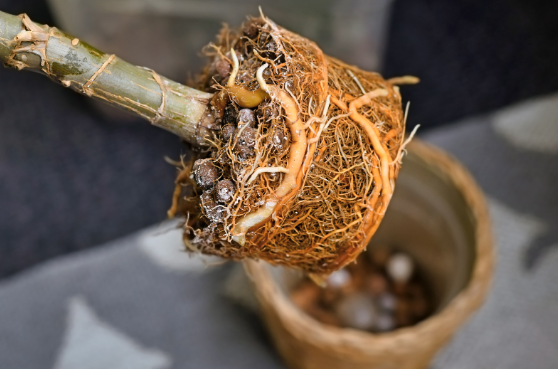
Additionally, as plants grow, their roots can become crowded and tangled, leading to a condition known as root-bound, which limits growth.
By repotting, you can loosen the roots and give them more space to expand. This process also improves drainage, as compacted soil can lead to waterlogged roots, increasing the risk of root rot.
Finally, a fresh pot and soil can enhance the overall aesthetics of your plants, keeping them looking vibrant and healthy. Regular repotting ensures your plants thrive and reach their full potential!
Best Time to Repot
The ideal time to repot plants is during winter or late fall when they are in a dormant state. While spring may seem like a great time for a fresh look in your home, it’s more important to consider what will make your plants happiest.
Transplanting can be quite stressful for plants, so it’s best to do it when overall stress is minimized, like in the winter months. For indoor plants, late winter is the perfect moment to repot, as natural light begins to increase and plants start to wake from dormancy.
However, outdoor plants require a different approach; it’s crucial to transplant them before the soil freezes.
As landscaping expert explains, “Very late fall and early winter, before a hard frost occurs, is the ideal time for transplanting outdoor plants. The soil remains workable, while the plants have already entered dormancy.”
Repotting Signs

You’ll know it’s time to repot your plant when you notice any of the following signs, especially if they appear together:
- Stunted Growth: If your plant has stopped growing, it could be due to several factors, but a pot that’s too small is a major culprit.
- Leaf Drop: If leaves are falling off, your plant might be root-bound or lacking the resources it needs to thrive in its current pot.
- Poor Drainage: If water beads up on the surface of the soil or takes a long time to drain, it’s a sign that repotting is necessary.
- Distorted Pot: A misshapen or cracked pot can indicate that the roots have outgrown their container.
- Visible Roots: If roots are surfacing on the soil, it’s a clear sign that the pot is too small for your plant.
Keeping an eye out for these symptoms can help ensure your plants remain healthy and happy!
Benefits of Repotting
During winter, plants enter a dormant state, shifting their energy away from growth and focusing instead on maintaining the essential functions needed to survive the colder months.
As landscaping expert explains, “They are solely focused on staying alive instead of flowering or leaf growth.
A general rule of thumb is that the cooler the weather, the less stress a transplant will experience.”
Want more gardening tips? Sign up for our free gardening newsletter for our best-growing tips, troubleshooting hacks, and more!
What to Keep in Mind
Before you repot, consider these two important factors to ensure your plants receive the best care:
- Blooming: If your plant is currently blooming or flowering, it’s best to wait until this cycle is complete before repotting.
- Avoid Unnecessary Repotting: Don’t repot just for the sake of it; only do so if your plant truly needs more space.
Being mindful of these considerations will help keep your plants healthy and thriving!
Cautions & Tips
Give your houseplants the best winter care possible to keep them healthy with these simple tips:
Limit Temperature Extremes
Plants thrive in stable, moderate temperatures. Winter can be tough, with the cold drafts from windows and the warmth from heating systems creating extremes. Make sure to check the environment around your plants.
Keep them away from radiators, baseboard heaters, and any spots where they might catch cold gusts, like near doors or in unheated areas such as mudrooms. In general, try to shield them from strong air currents, especially near windows, staircases, and doors.
Clean the Leaves
Winter can make your plants a bit dusty, especially if you use forced air heating. Make it a habit to dust and clean their leaves regularly, and keep them away from dusty areas like HVAC vents and exterior doors.
This helps your plants breathe better through their tiny pores and ensures they can absorb as much light as possible.
Raise Humidity Levels
Humidity levels often drop in winter due to heating, which can leave your plants feeling dry. To combat this, consider using humidifiers to maintain humidity levels around 40 to 50 percent.
Another trick is to cluster your plants together—when grouped, they can share moisture and help each other thrive.
Adjust for Light Changes
Winter brings a shift in light patterns, which can affect how much light your plants receive. A spot that was bright in the fall may now be shaded. Keep an eye on these changes and move your plants around as needed to ensure they’re getting enough light throughout the season.
Understand Dormancy
Plant dormancy is perfectly normal and helps them conserve energy for the spring. It’s not uncommon for plants to lose some leaves or show signs of dead vegetation during this time. Just continue to care for them, and trust that with a little patience, they’ll bounce back when the growing season returns.
Control Insects
Unfortunately, some pests find their way indoors during winter, including aphids, which can spread quickly between houseplants.
Since your plants are inside, it’s important to tackle these pests naturally. You can gently knock them off with water or by hand, then follow up with neem oil spray to keep them from coming back.

